

This guide is to help with digital image sizing for general online media, with some specific focus on illustration.
If you’ve never pressed your nose against an old tv, you may not know that pictures on your screen are made up of miniscule dots called pixels. Pixels are the dots that make up most most pictures you’ll see online, known as Raster or Bitmap images. Pixels are almost impossibly small. Screens have tiny pixels so that instead of seeing the granules, you see the pattern produced from all of the dots. Because of this, it’s hard to get a feel for digital image sizing rules.
For most uses online, Image File Types will generally be: .png .jpeg or .gif
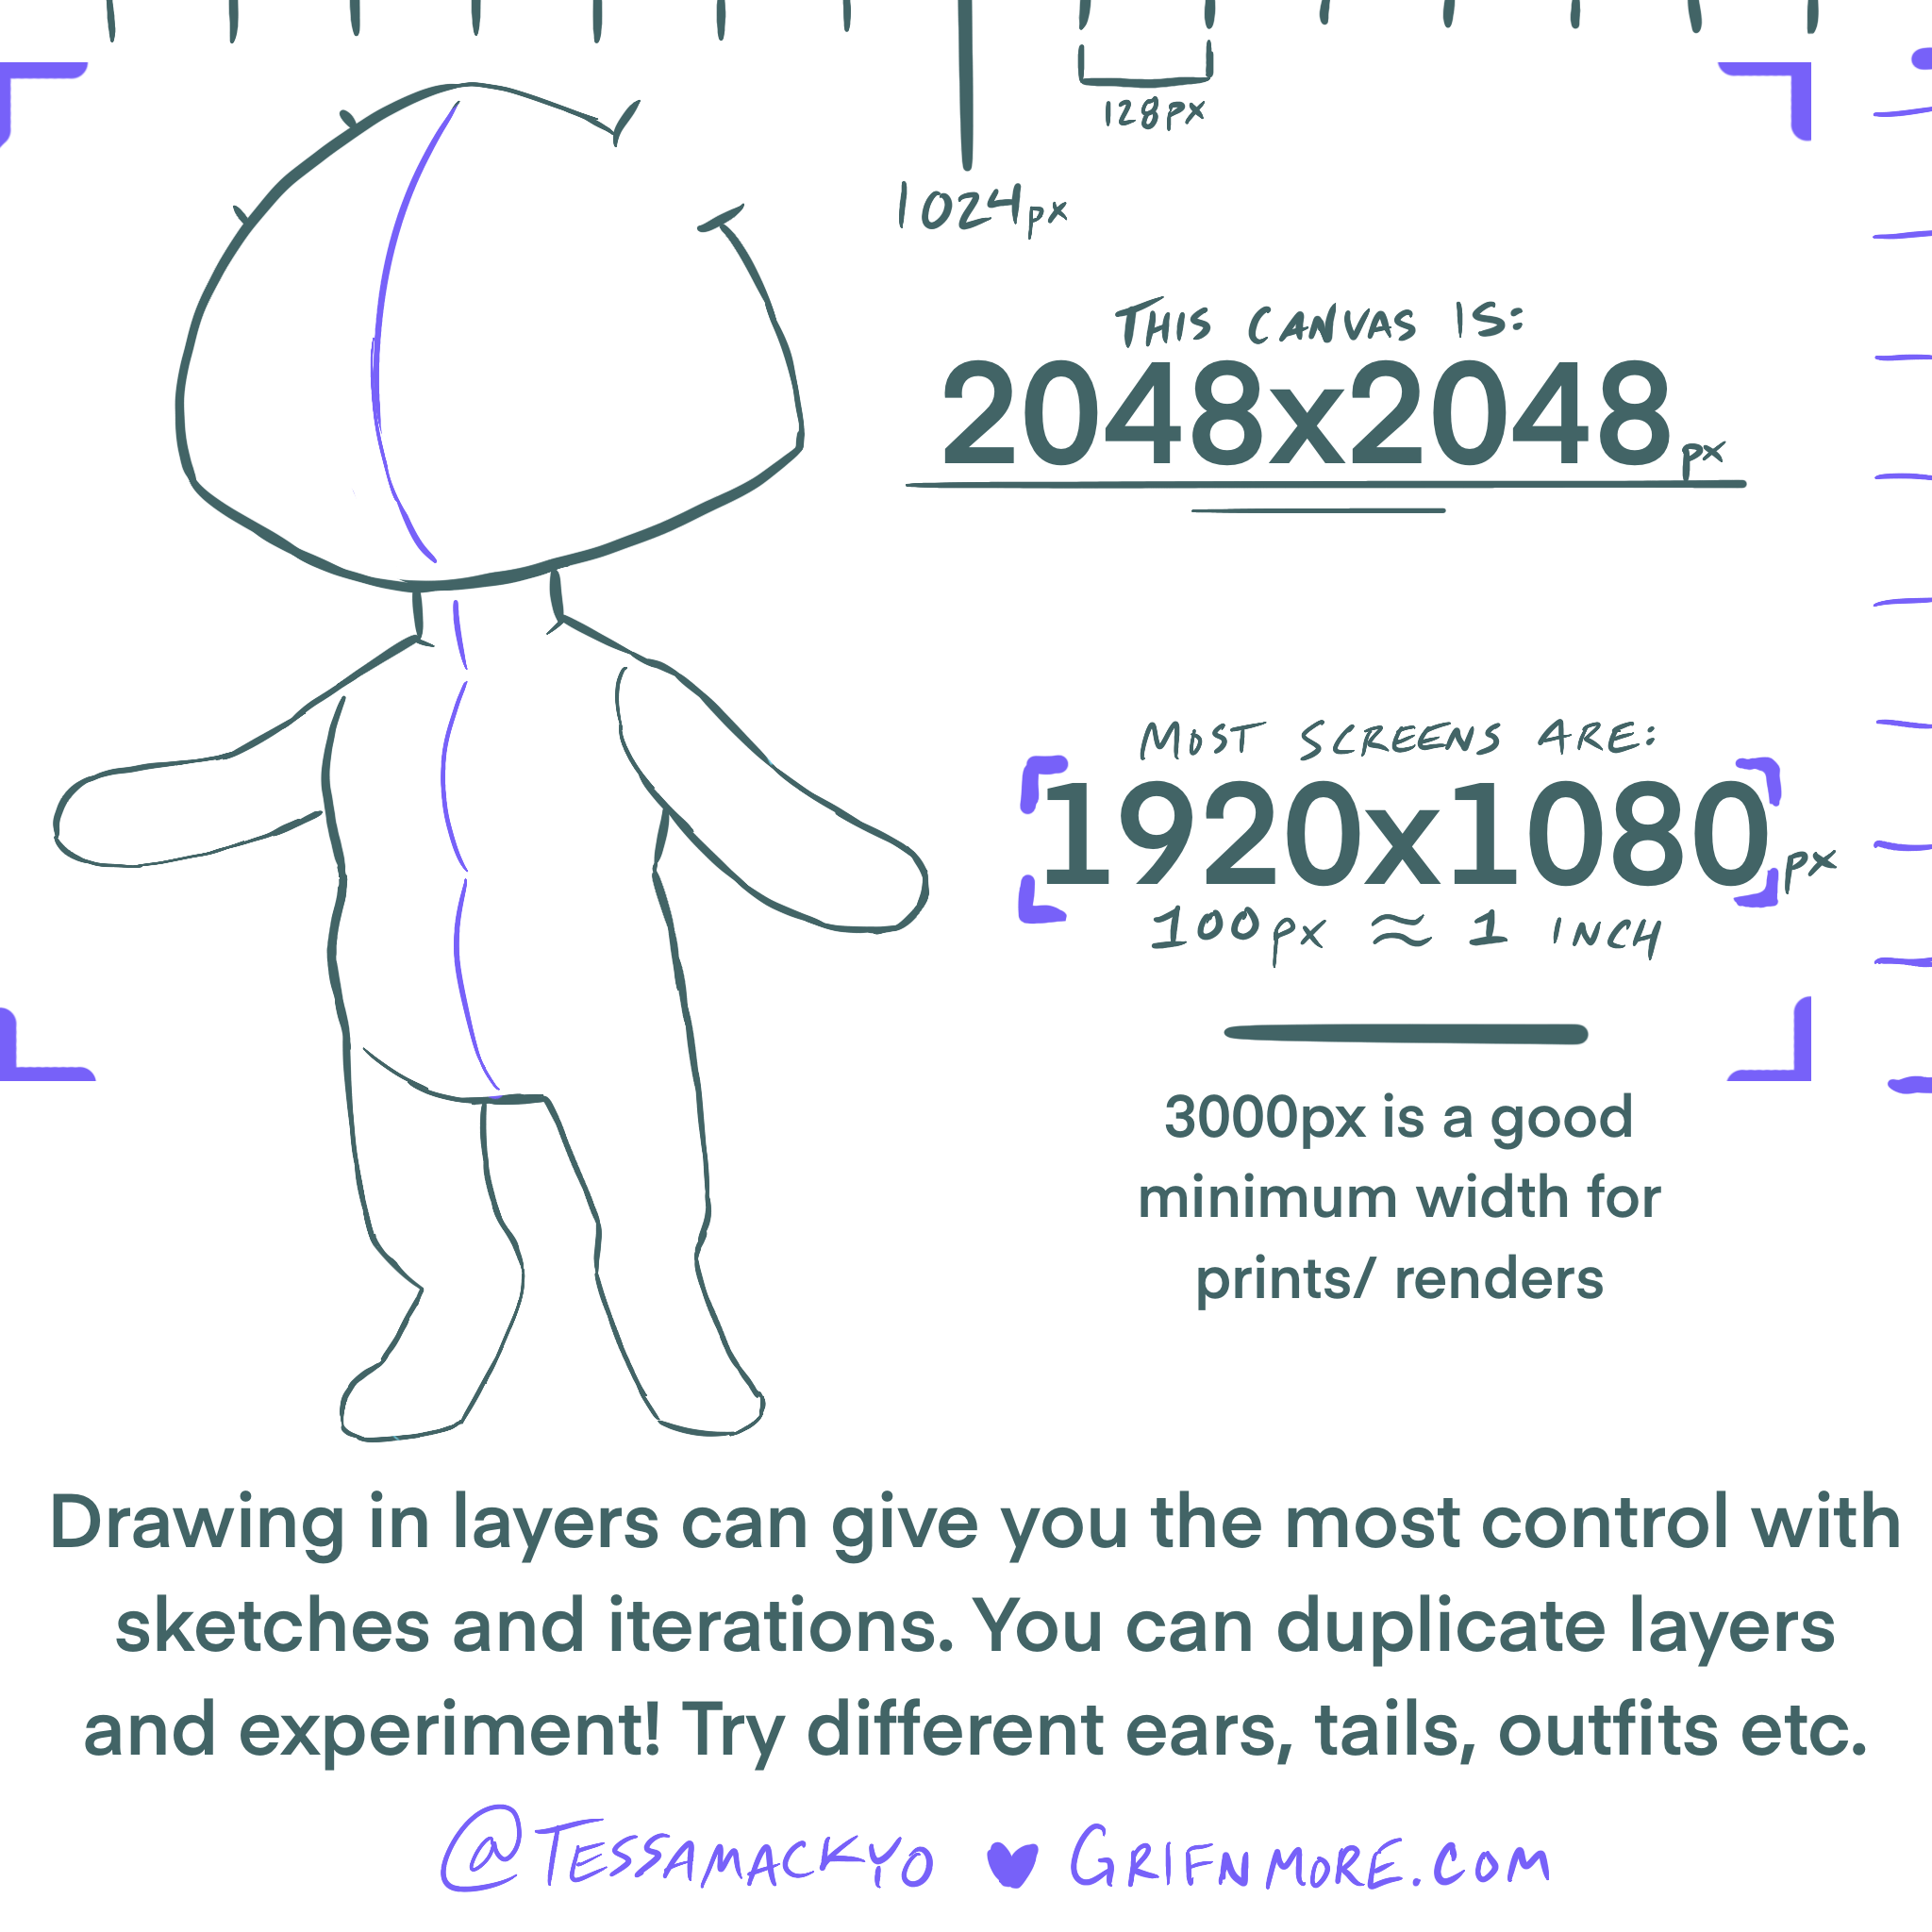
What is a web-sized image? Well, if you’ll be posting on the internet then you’re creating your image with the intent of being seen on the web. Most computer screens are 1920 x 1080 pixels width x height, so this should inform the size of picture you’ll be using. Typically, you don’t need anything that’s larger than your average screen.
100px is roughly 1 inch on a screen
This can vary more when it comes to Retina screens and handling print media, but for web-sized images then you’ll follow this rule of thumb. Most screens will show about 100px per inch. Being able to measure out 1 inch can help you think in analog terms. It can also help to use a Screen Ruler Extension for your Browser for practice.

Most screens are 1920x1080 pixels
The most helpful reference is the average screen size. Knowing that most screens are 1920 x 1080 pixels on average, you can use that as a frame of reference for your web-sized images and determining how big a final product might need to be. If you’re posting larger files, there are risks with other people or bots saving your files for reproduction, and otherwise wasting bandwidth and download speed for your site.
This is where geometry comes in– if we needed an image to cover half of the width of the screen, we might only need an image that’s around 950 pixels wide at the most. Smaller images can load faster on self-hosted websites, but it can be a generally good idea to slightly “over-estimate” the sizing just in case.
Keep a copy of the original full-size files, but always size down and optimize your images for the final image you want to post.
Oversized images can lag websites and even slow down your system while you work on the large files. Try to be wary about your digital image sizing when you upload in general. When posting to a social media platform, it could also be compressed and lose visual quality. In some cases, editing your images before upload can clear data or prevent random compressions. For WordPress development, we like to use TinyPng to help with stripping metadata and losslessly-compressing images, to keep them at the highest quality possible.
Keep copies of your Originals!
One important point to consider is that raster images (which are basically ALL images on the internet) are made up of pixels, these images cannot be scaled without altering or even losing pixels. This is a lot like tiles in a mosaic: when we look closely, we see each point in the artwork. The mosaic itself needs to be quite large to sell the illusion of the small tiles as a whole image. Like trying to resize a mosaic and crushing the tiles, raster imagery will lose pixel data if resized or cropped. Vector images have an entirely different way of operating, they use math to plot points to create clean lines and curves out of data. They don’t tend to look like photos or painted images because of this.
Digital illustrators start with huge canvases because of this principle: Start large, and you can scale down. Large images work best for small detail rendering as well as for use in print media. DPI means the dots per inch on a printed surface, and correlates to the concentration of the pixels on your canvas. Because of this, make sure you use at least 300dpi for anything you anticipate printing. 2550×3300 pixels is about the perfect size for standard printer paper sheets.
For print purposes, it can be best to use a canvas that's at least 3000px wide in either direction.
Feel free to save the base above and trace for practice!
Tag @grifnmore to share what you make
Read more about drawing in layers:
Once you have your canvas prepped with the right sizing, make sure you are using separate layers to start creating your sketches and art. Layers are the key to having complex artwork and being able to “color under” your lines. Planning to use separate layers will give you the most control over your work.
Read more about using layers to make your artwork into a puppet that can move and react:

Drawing a 2D vTuber for Adobe CH
A good majority of existing vtubers use 2D illustrated rigs!...
Read MoreWe only covered Raster Images in this tutorial.
Vector is another type of image file that helps with infinite scaling (as opposed to the stained-glass tiling of Pixels). We aren’t covering vector in this tutorial, but we’re open to exploring more topics in future!
This post was written in part by @Tessamackyo